
Perhaps the most precious resource on your allotment is your soil. After all, it’s what everything needs to grow and therefore it’s really important that you look after it. There is a phrase that can be applied to so many different situations in life that is equally applicable to us as allotment growers.
Garbage in, garbage out
This means that if you put little to no effort into looking after your soil, ultimately the quality of your crops will suffer. And it’s important to realise that this might not necessarily show in year 1 or year 2. Indeed, for the first couple of seasons, you might find that you are able to produce good, healthy crops. But over time, as the soil releases its nutrients and minerals into your crops, it will steadily decline in quality, eventually turning quite infertile. Simply adding liquid, powdered or pelleted fertilisers to your plants while they are growing will only mask the potential problems of not looking after your soil properly.
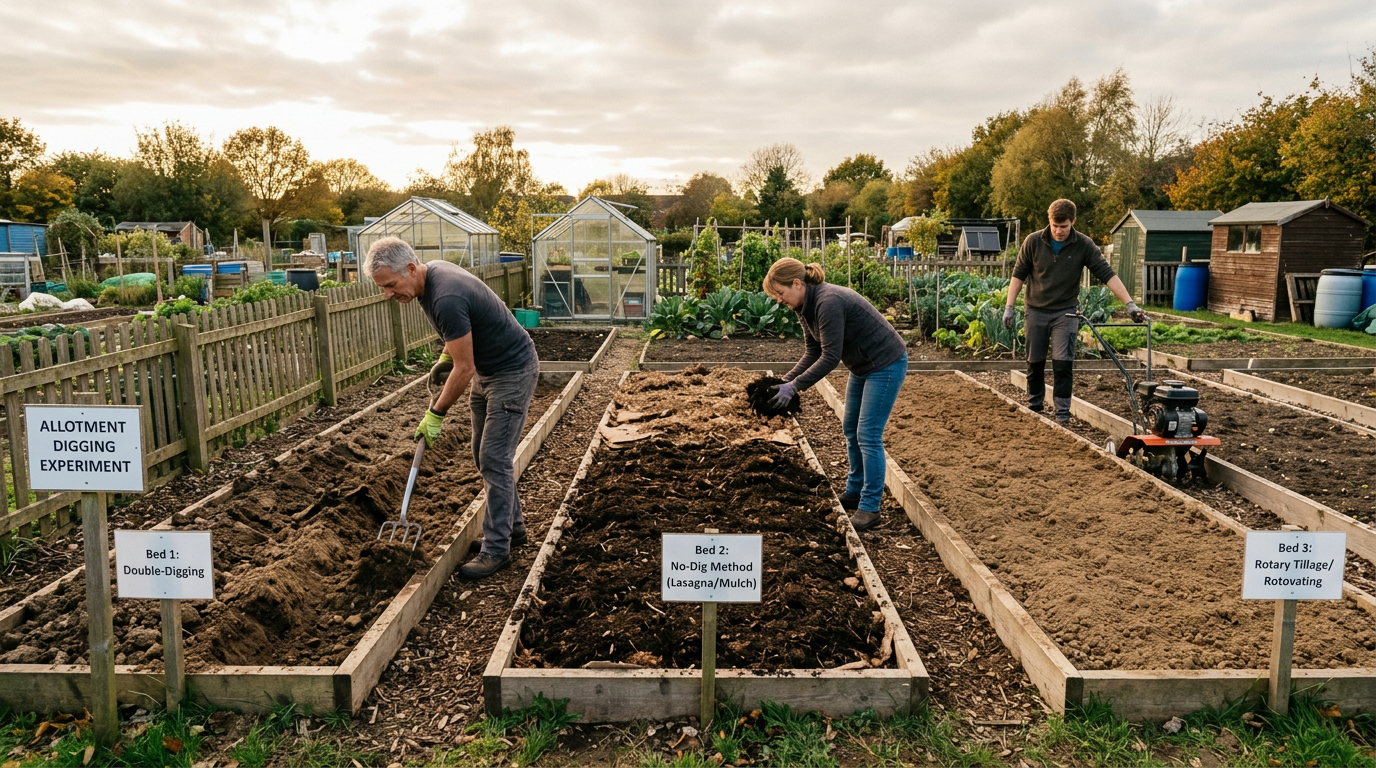
Soil health isn’t only about nutrients and minerals though. There is a whole ecosystem of life supported on the surface and below it. So how can we look after our soil, support the ecosystem and ultimately benefit by growing stronger and better crops? To answer this question, this article looks at three different ways of preparing your soil for growing. Each has its own pros and cons and there is no outright correct answer as to which one you should use. It’s up to you as a grower to decide.
Traditional Double Dig
The first thing that people often associate with having an allotment is the amount of digging involved. Traditional growers pride themselves on having well dug, weed free and light crumbly soil. It can take a great deal of effort to get what looks like a great soil texture, ready for growing. Double digging essentially means going two spade depths into the soil, breaking the soil clumps up as you go, removing large stones and weeds. It’s often carried out by digging a trench, pushing the spoil to one side, and then widening the trench, turning the soil over into the first side and repeating the process in rows through the whole growing space. It takes a great deal of effort but is a very good way of getting rid of all the unwanted things like weeds, stones and rubbish. It’s also a great way of adding and mixing organic material into your soil in the form of compost or manure to give your crops a great source of food and nutrition. Let’s look at what happens below the surface, and then the pros and cons.

Pros
- Aerates compacted soil very efficiently.
- Allows for good root penetration.
- Helps introduce organic matter down through the whole soil profile.
- Adds structure and improved drainage.
- If you are taking over an area heavy with weeds, it’s a great way of getting on top of that problem.
Cons
- Lots of effort and time needed to get right.
- Often brings dormant weed seeds to the surface that will start to germinate and grow.
- Soil life is affected, with a reduction in worms and fungal activity.
- Need to wait for the right weather to make the technique work effectively.
- Carbon retention is affected as soil is exposed to the air.
Minimal Disturbance
Looking after your soil doesn’t have to be all about digging down deep and spending hours of backbreaking work to get your growing space perfect. Minimal disturbance is precisely what it sounds like. It’s a method of only doing the minimum amount of digging or disturbing your soil. This might be in the form of running a hoe over the growing area or digging out individual deep-rooted weeds. It’s all about looking after the top couple of inches of your soil but only going deeper where you really need to. This technique has a dependency on nature, relying on the life below the surface to do the work for you that would otherwise be achieved by the traditional double dig method. Organic matter can be added to the surface of the solid and lightly worked in if required. The rest of the work is done by worm activity, or similar, as the organic matter is broken up and pulled down into the soil profile.

Pros
- Less time and effort required to prepare your soil initially.
- Over time, your soil health improves with better carbon retention and allows fungal networks to become more established.
- Adding a light mulch or organic matter as part of this approach helps lock in moisture under the soil surface.
- From having better soil health, your crops are better equipped to defend themselves against disease and pests.
- Stronger root growth encouraged as they push down through the soil profile and worm channels.
Cons
- Takes several seasons to start seeing the main benefits of improved soil health.
- Crops such as carrots may fork a lot if you don’t dig down and remove stones.
- Soil can be quite compact near the surface at first affecting drainage.
- With improved biodiversity other pests such as moles can be attracted to your plot as they feed on worms, beetles and such like.
- Perennial weed growth can still be an issue if the roots aren’t fully removed.
No Dig
No dig gardening has been around for a long time but has recently seen a resurgence in popularity due to the likes of Charles Dowding who spends a great deal of time educating growers in its benefits. Out of the 3 growing methods in this article, No Dig is the one that mimics mother nature the most. If we look around our natural environment and the flora it supports, we don’t see significant soil disturbance, but we can find plenty of strong and healthy plant growth. No Dig takes some of these principles and also has other benefits. At harvest time, surface crops are cut at the soil surface, and the roots are left to break down in the soil naturally. As the name suggests, a spade or fork is not required. A cover layer such as cardboard is laid on the soil surface, although the cardboard layer is not required every year if you don’t want to. This prevents light from reaching any weeds or growth from reaching light, and they eventually die off. On top of the cardboard comes a layer of compost, several inches thick. As the cardboard decomposes, the compost is then worked down into the soil by worm activity, or other burrowing critters. No dig is all about adding layers to the top of your soil and letting nature do the rest.

Pros
- The best approach out of the 3 for achieving good soil health.
- Least time consuming and easiest approach to take that allows planting almost straight away.
- A low maintenance approach with no hard digging required.
- In tests, it produces the highest yield of crops when compared to double digging methods.
- As the surface is always quite light and crumbly, weeds are very easily lifted out of the compost layer without needing to dig down.
Cons
- To achieve the best soil health and biodiversity possible, it can take a number of years to realise the full benefits.
- Sourcing sufficient good quality compost in volume can be challenging, especially for growers with larger plots.
- Sourcing the correct cardboard in volume can also be a challenge. It needs to be free of tape, sticky labels and any toxic adhesives or print.
- Growing crops such as potatoes becomes a big challenge as sowing and harvesting both require digging with growers often growing in containers instead.
- Increased biodiversity under the surface can attract burrowing animals that feed on the creatures living in the soil and maintaining a no dig approach can mean that you have to contend with large voids under the surface that your crops will struggle to contend with.
Summary
We’ve covered 3 possible ways you can look after your soil and improve your allotment. There may also be elements from each that you want to bring together rather than adopting one single approach, but again it’s important to remember that there are no right or wrong approaches. The one thing that all these techniques have in common is the requirement for adding organic matter. You can not expect your soil to provide a limitless supply of everything your crops needs without help. Sourcing the organic matter is all part of running an allotment space. The most convenient, but expensive method is buying it in, typically as bags of compost. You could also consider sourcing manure from a local stable or farmyard. This may require a bit of time and doesn’t come without the potential consequences of introducing other unwanted compounds such as aminopyralids into your soil that you have to test for before spreading it onto your plot. The cheapest method will always be making your own compost on your own plot. You can add disease free waste from your own allotment and even bring in food scraps from home to make it. Though this is the cheapest method, there is still the challenge of producing enough volume to support your whole plot.
Credit: Images designed and developed using Copilot AI